SSO Configuraton
Single Sign-On (SSO)
Single Sign-On (SSO) allows users to access multiple applications or services with a single set of login credentials. This means that users can log in once and gain access to all applications that are part of the SSO ecosystem without the need to log in separately to each application.
You need to configure SSO parameters for at least one SSO Provider in docker-compose file to log in
promptsail-backend:
    ...
    environment:
        ...
        GOOGLE_CLIENT_ID: '920***********.apps.googleusercontent.com'
        AZURE_CLIENT_ID: '6fe*******aaa'
        SSO_AUTH: "True"
    ...
promptsail-ui
    ...
    environment:
        # Google
        PROMPT_SAIL_ENV_PLACEHOLDER_SSO_GOOGLE_CLIENT_ID: '920***********.apps.googleusercontent.com'

        # Microsoft Azure
        PROMPT_SAIL_ENV_PLACEHOLDER_SSO_AZURE_CLIENT_ID: '6fe*******aaa'
        PROMPT_SAIL_ENV_PLACEHOLDER_SSO_AZURE_TENANT: '4a1******aaa'
        PROMPT_SAIL_ENV_PLACEHOLDER_SSO_AZURE_SCOPES: 'user.read'
        PROMPT_SAIL_ENV_PLACEHOLDER_SSO_AZURE_AUTHORITY: 'https://login.microsoftonline.com/4a1*****aaa'
    ...
In the next steps I’ll show you how it’s done
-
SSO Google Configuration
To make it work you need to replace
PROMPT_SAIL_ENV_PLACEHOLDER__SSO_GOOGLE_CLIENT_IDandGOOGLE_CLIENT_IDfor yours Client ID and of course you need Google account. For more info about this process, visit the Google Documentation- Go to console.cloud.google.com (log in to your account where you will be performing the SSO configuration)
-
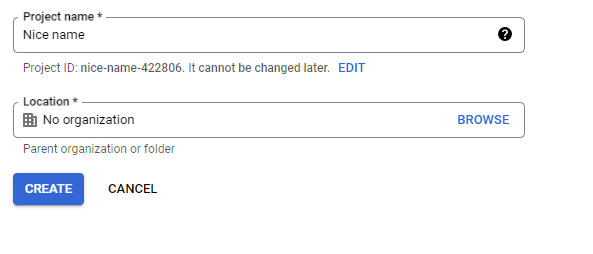
In the top left corner look for Select a project (this can also be the name of the current project), press it, then press on NEW PROJECT button. A form should open. Fill it as you want then press CREATE button
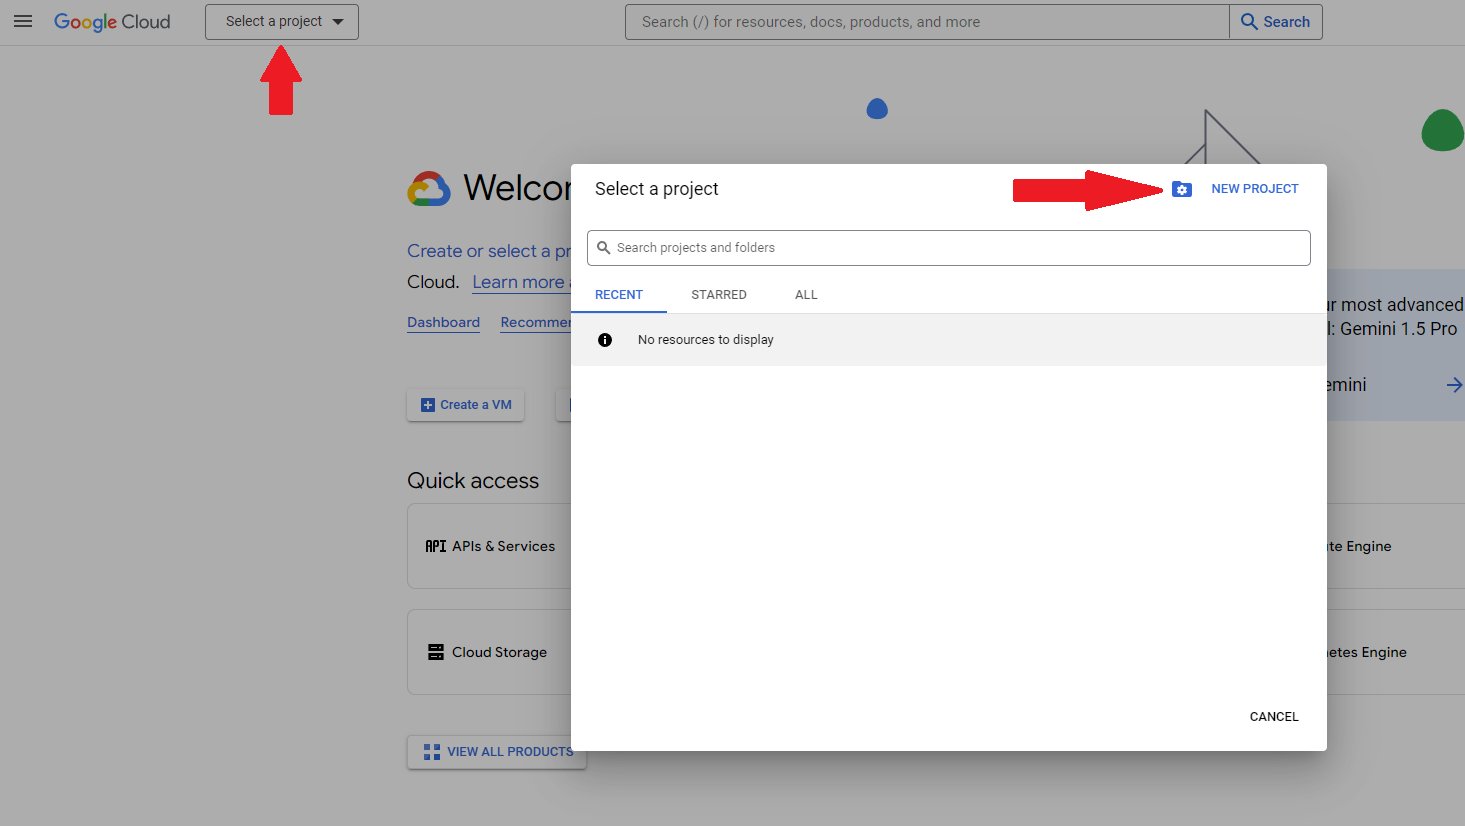
- Once created, easily press SELECT PROJECT in Notifications or select it via Select a project
-
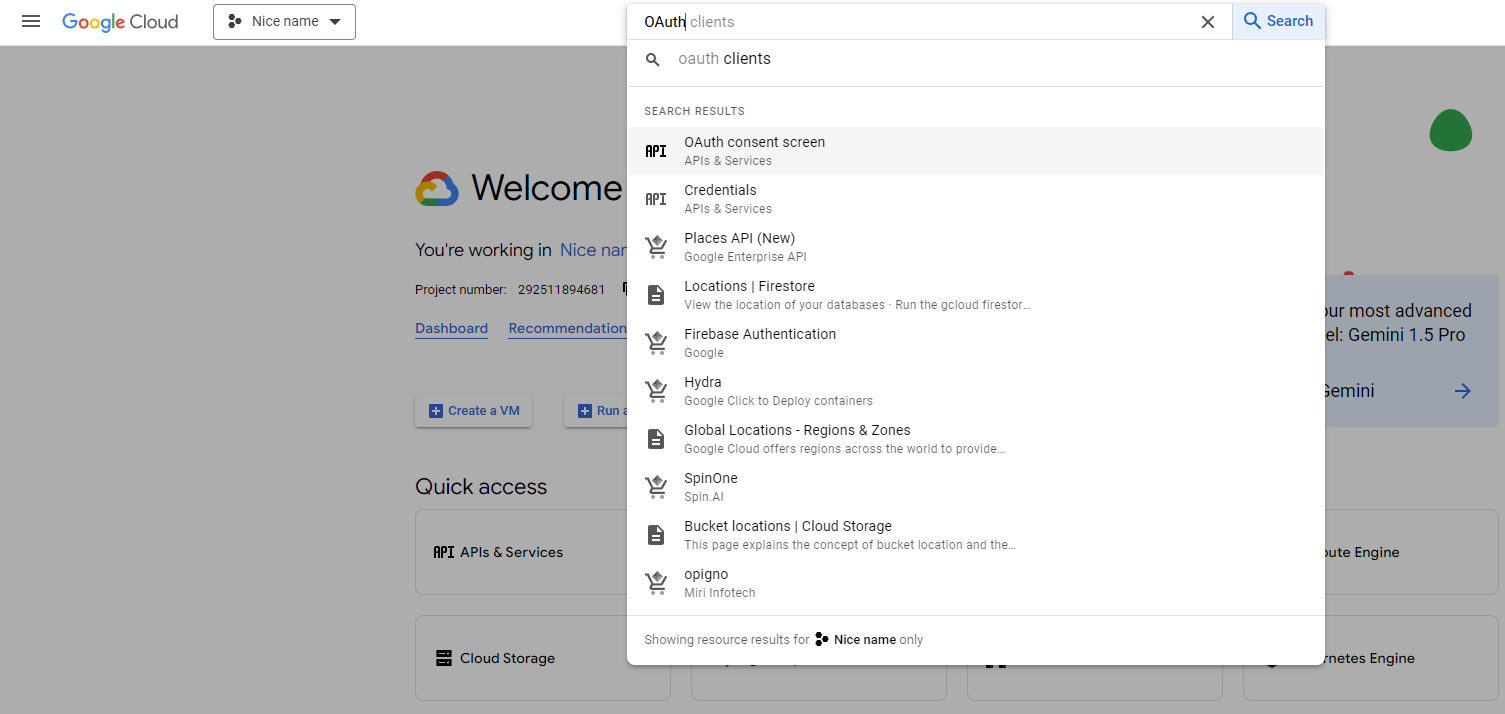
You then need to go to OAuth consenst screen. You can easily type it in search bar and select it or look for it in the Quick access section
-
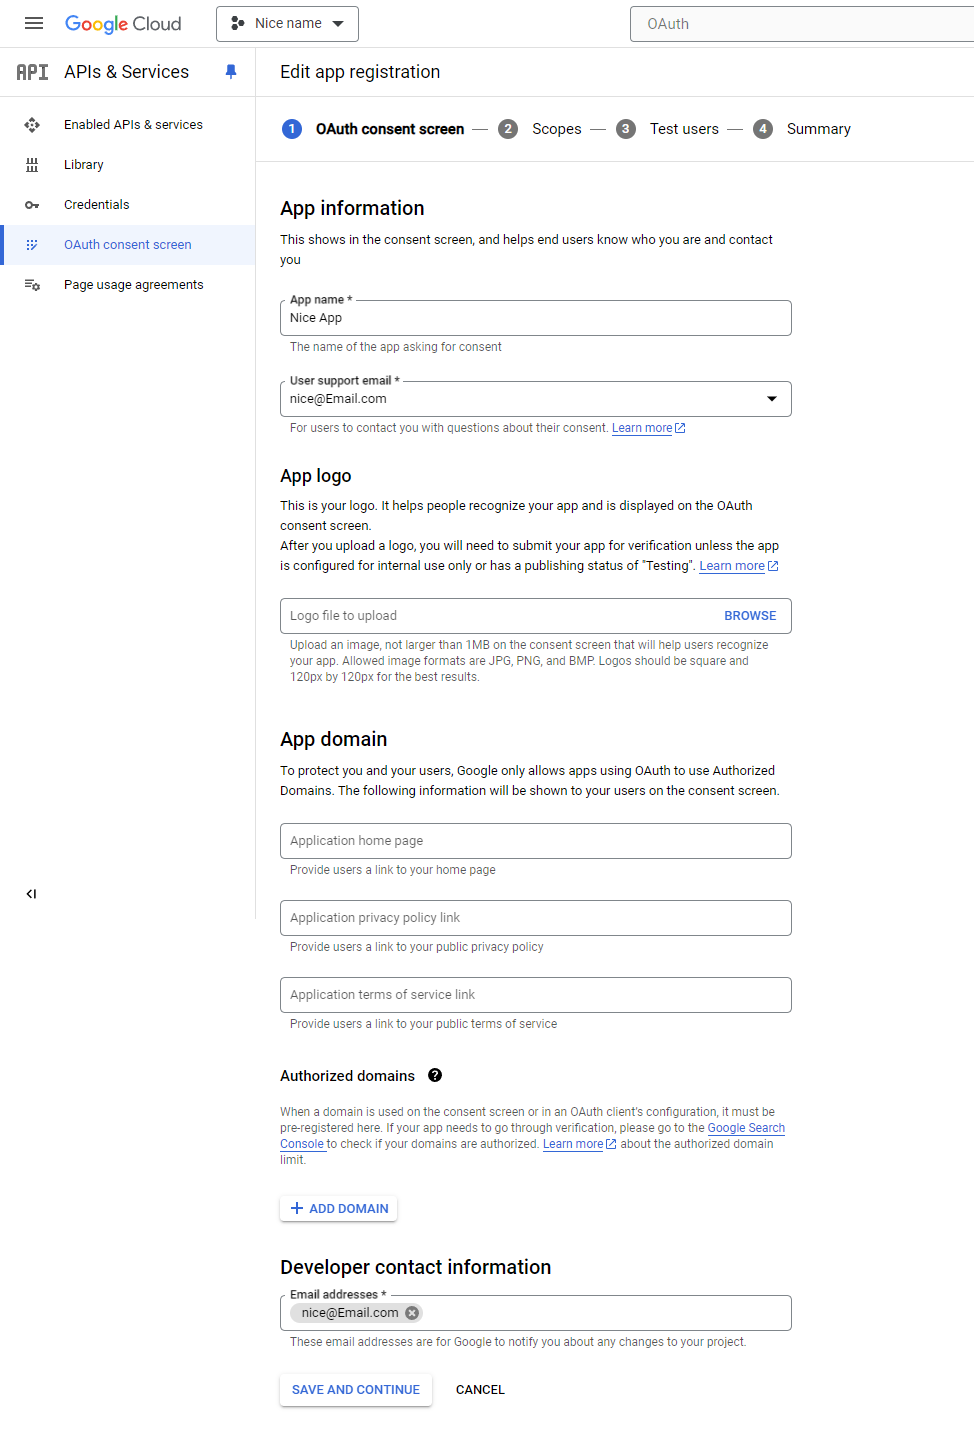
When you are there select User Type and press CREATE

-
Next to do is fill the fields about your App information. Fill it as you want and press SAVE AND CONTINUE. The most important are App name, User support email and Developer contact information
-
In next sections Scopes and Test users form is no need to fill anything. For promptasil app is unnecessary. Fill it as you want or scroll down and press SAVE AND CONTINUE.
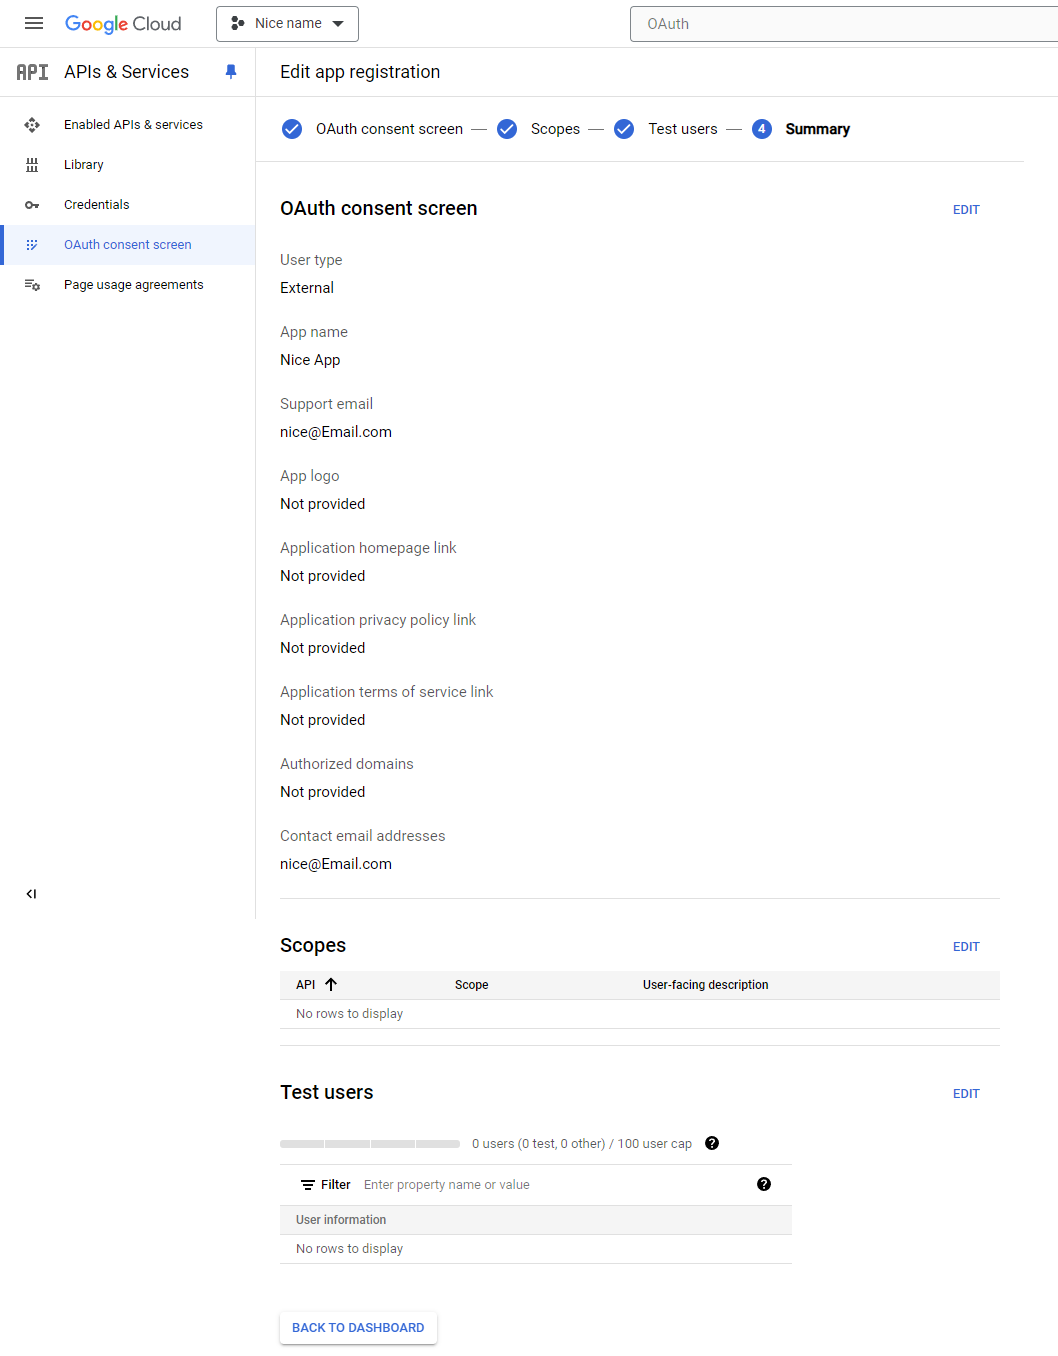
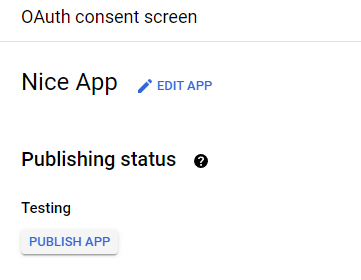
Once you have gone through the whole form press BACK TO DASHBOARD. If you have not added any Test users, you need change Publishing status to In production by pressing PUBLISH APP in the OAuth consenst screen dashboard. The Testing status allows only users listed in Test users list to log in.
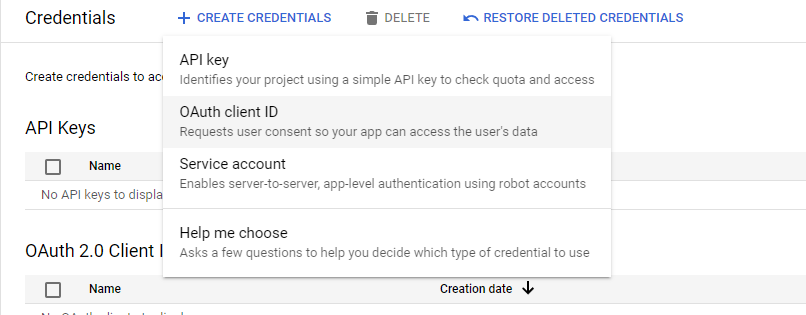
Now go to Credentials tab.
-
Press CREATE CRENDETIALS and choose OAuth client ID. The next form will open.
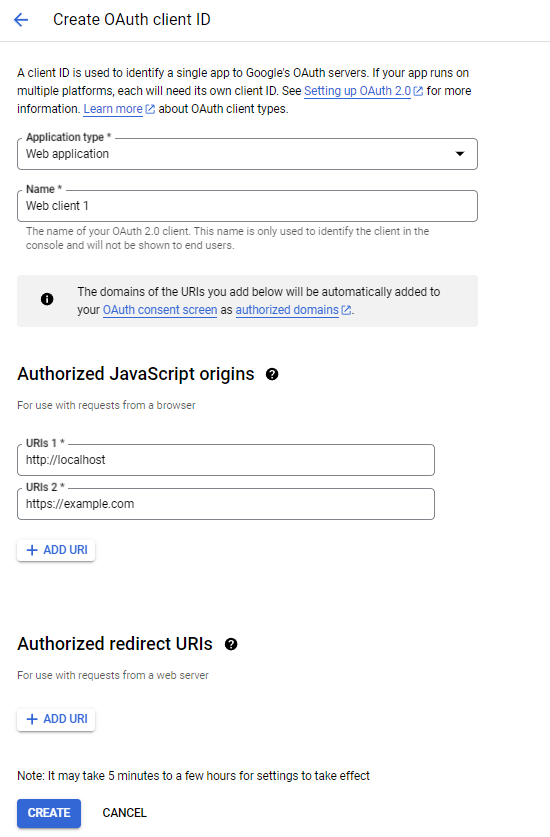
- In Application Type select Web application and you can enter any name you like.
- Authorised JavaScript origins is the most important configuration in the whole proccess. It gives login access for provided URIs. Press ADD URI and type valid url where promptsail app will run. You could enter internal or external URL. Enter only hostname, without subpages. The default configuration is
http://localhost. Remember to specify the port if it’s other than 80, for examplehttp://localhost:5173 -
Press CREATE button. No need to fill more information for now
The form will then close and a modal window will appear where you can find the Client ID (the same information can be found by selecting Credentials and pressing on the name of one of the OAuth 2.0 Client IDs).
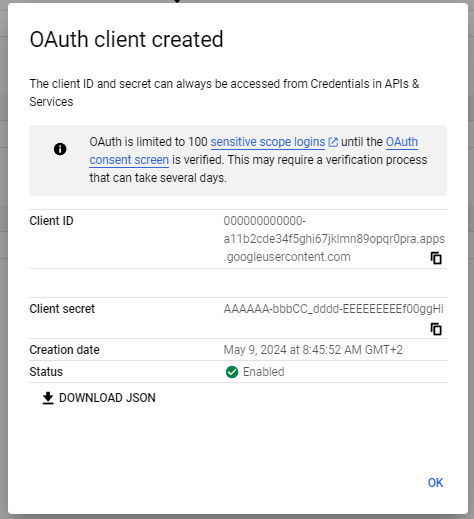
Copy and paste it to
docker-composefile in theGOOGLE_CLIENT_IDvalue for backend image andPROMPT_SAIL_ENV_PLACEHOLDER_SSO_GOOGLE_CLIENT_IDvalue for ui imagepromptsail-backend: ... environment: ... GOOGLE_CLIENT_ID: '000000000000-a11b2cde34f5ghi67jklmn89opqr0pra.apps.googleusercontent.com' SSO_AUTH: "True" ... promptsail-ui ... environment: PROMPT_SAIL_ENV_PLACEHOLDER_SSO_GOOGLE_CLIENT_ID: '000000000000-a11b2cde34f5ghi67jklmn89opqr0pra.apps.googleusercontent.com' ... -
SSO Microsoft Azure Configuration
To make it work you need to replace
AZURE_CLIENT_ID,PROMPT_SAIL_ENV_PLACEHOLDER_SSO_AZURE_CLIENT_ID,PROMPT_SAIL_ENV_PLACEHOLDER_SSO_AZURE_TENANT,PROMPT_SAIL_ENV_PLACEHOLDER_SSO_AZURE_SCOPESandPROMPT_SAIL_ENV_PLACEHOLDER_SSO_AZURE_AUTHORITYfor yours values and of course you need Microsoft Azure account. For more info about this process, visit the Microsoft Documentation- Go to portal.azure.com
-
Enter to Microsoft Entra ID
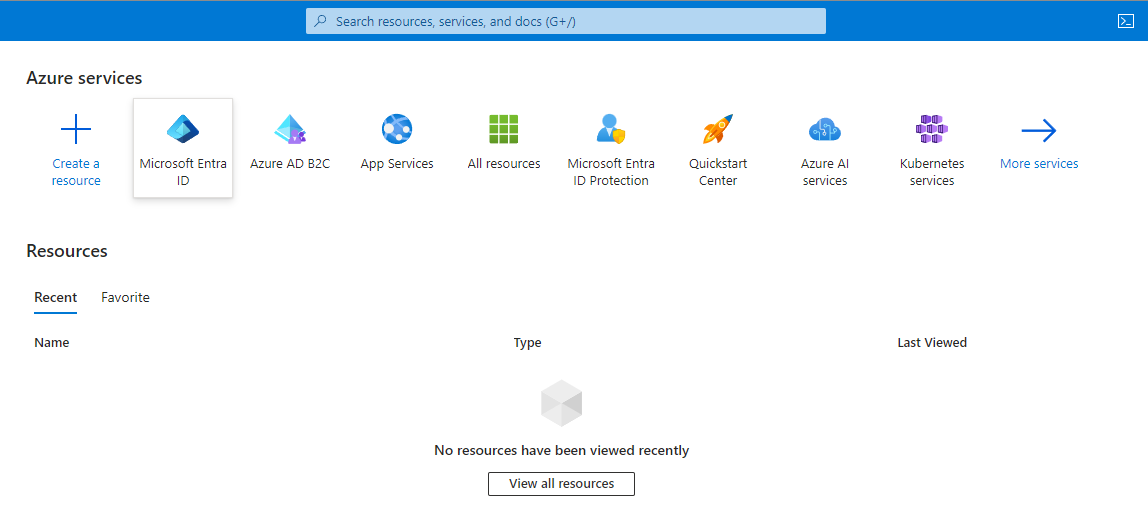
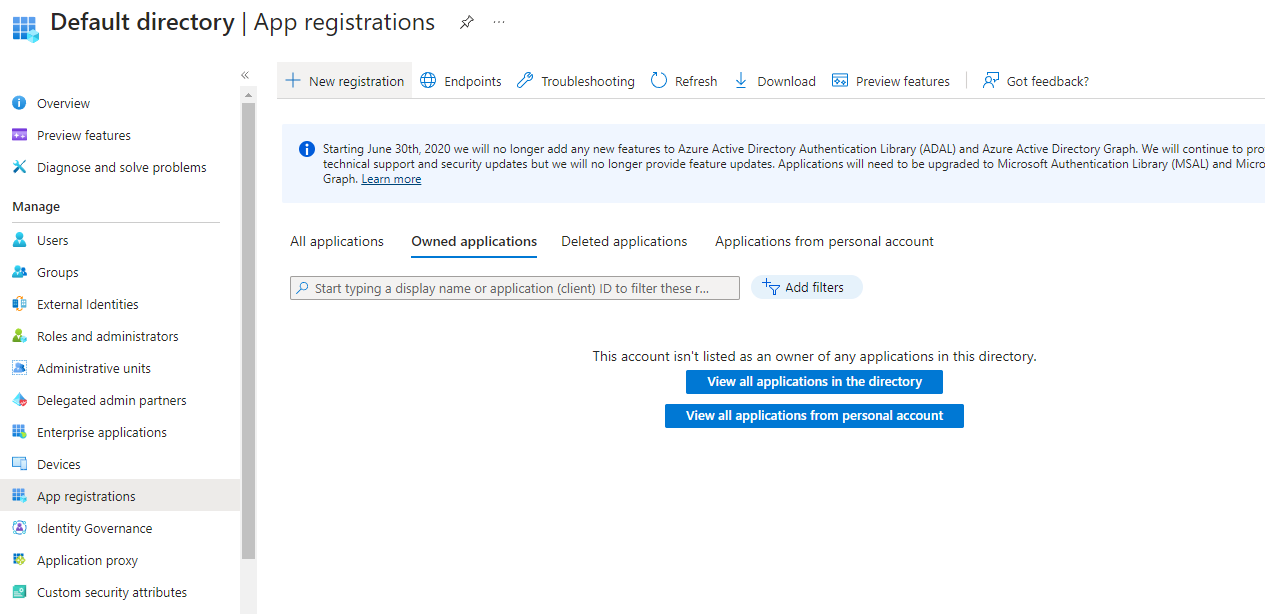
- Enter to App registration
-
Press New registration
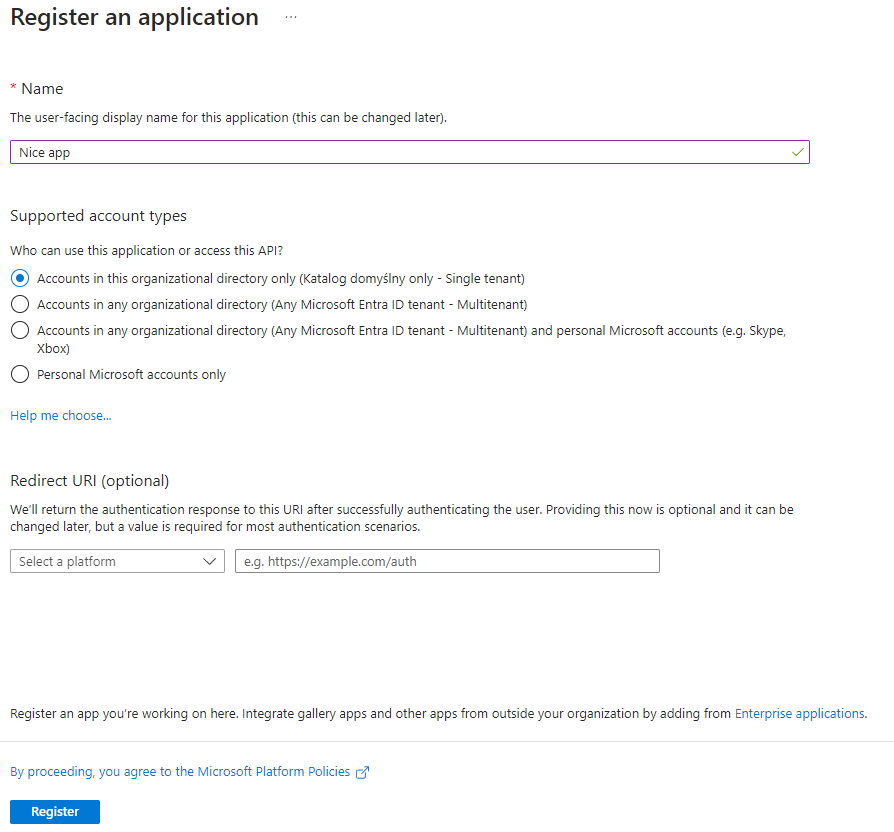
-
Fill the form like you want (you can leave Redirect URI blank. There will be more information on this in the next steps) and press Register
- Go back to Microsoft Entra ID > App registration
-
Find the app you created and press it
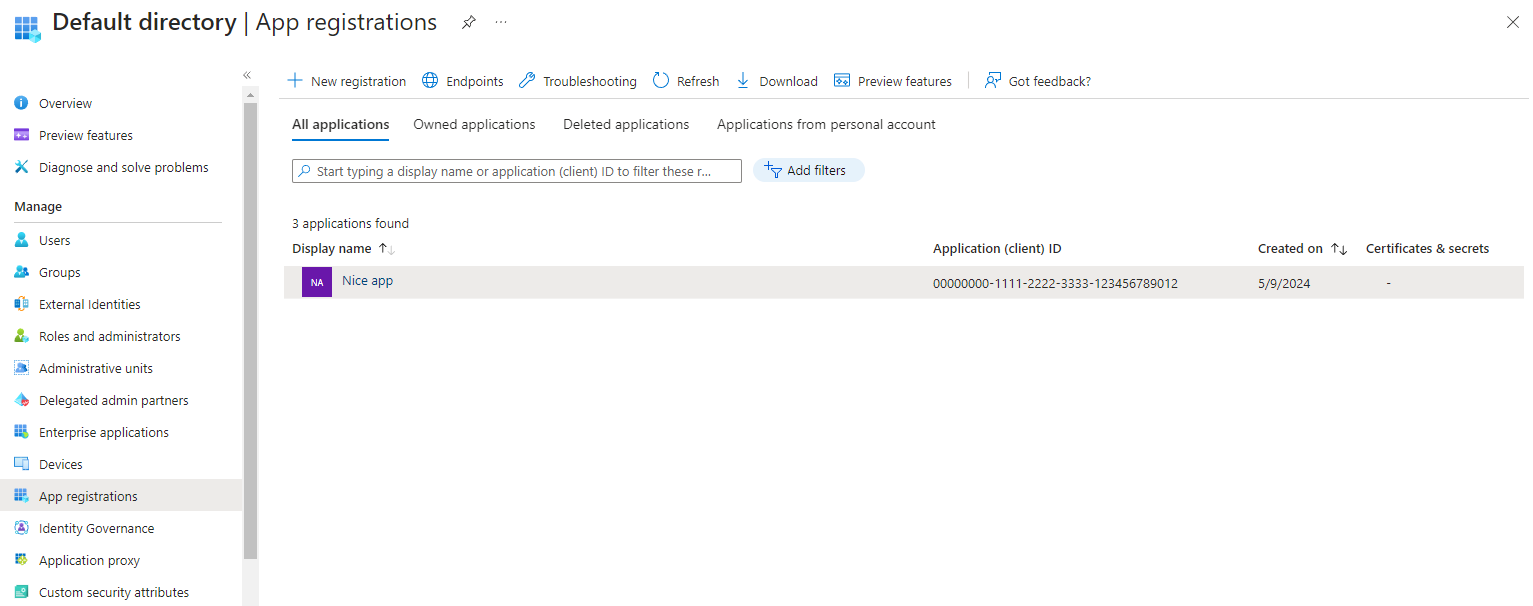
-
Here you will already have all the information you need to connect Azure SSO to promptsail app.
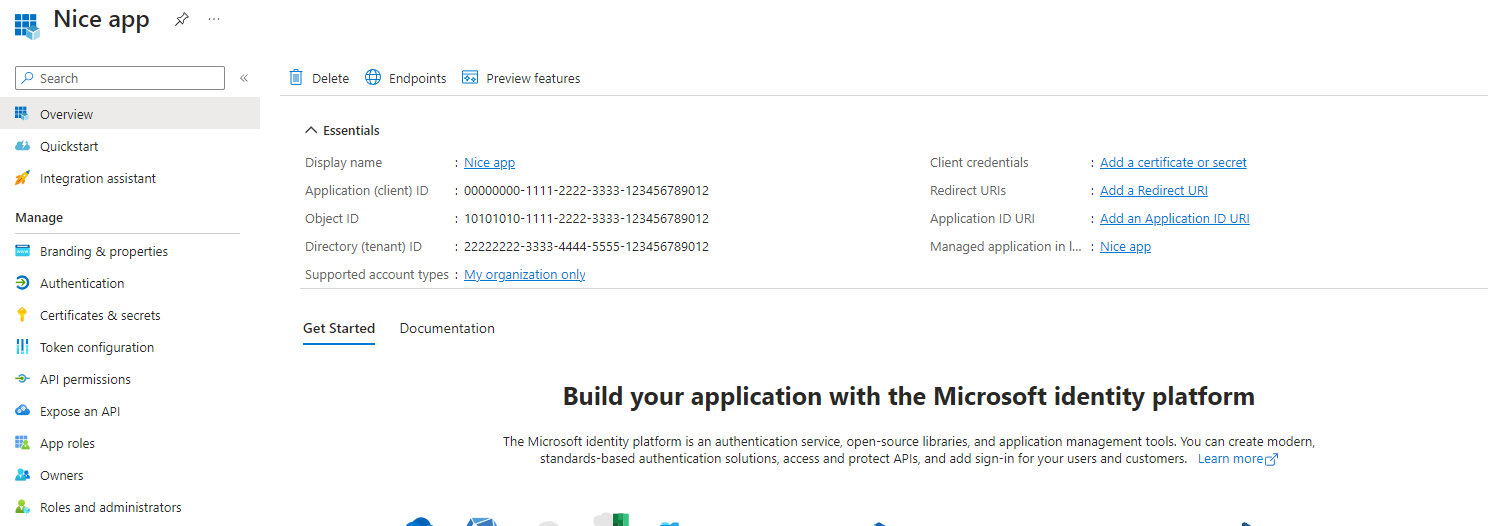
- set
PROMPT_SAIL_ENV_PLACEHOLDER_SSO_AZURE_CLIENT_IDandAZURE_CLIENT_IDto your Application (client) ID - set
PROMPT_SAIL_ENV_PLACEHOLDER_SSO_AZURE_TENANTto your Directory (tenant) ID PROMPT_SAIL_ENV_PLACEHOLDER_SSO_AZURE_SCOPEScan be left unchanged. We only need the basic information about your accountPROMPT_SAIL_ENV_PLACEHOLDER_SSO_AZURE_AUTHORITYis a URL made of two parts: a domain (aka instance), and a tenant identifier. It can be easily found by pressing Endpoints and pasting the first URL without/oauth2/v2.0/authorize<div style="text-align:center">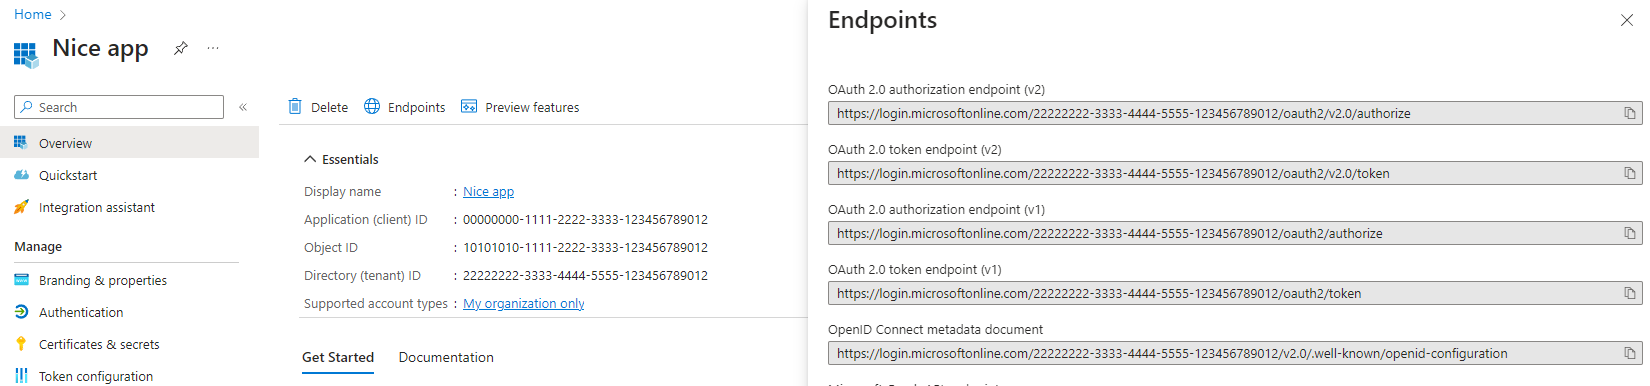 </div>
- set
- To get access login for promptsail app need to be added his login URL. Press Add a Redirect URI
- Press Add a platform
-
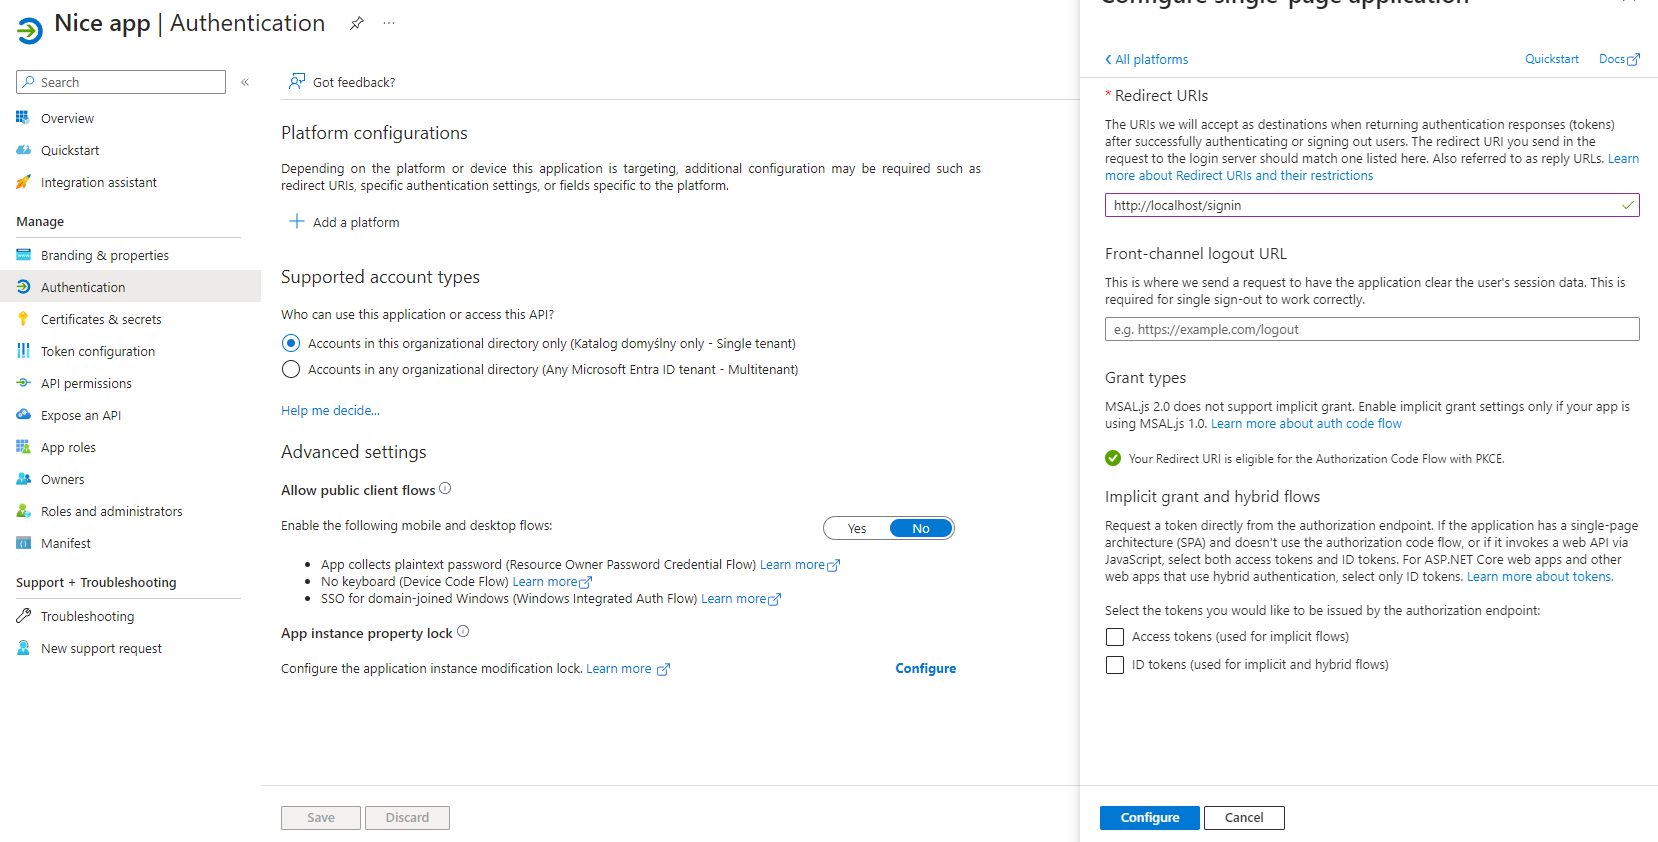
Select Single-page application
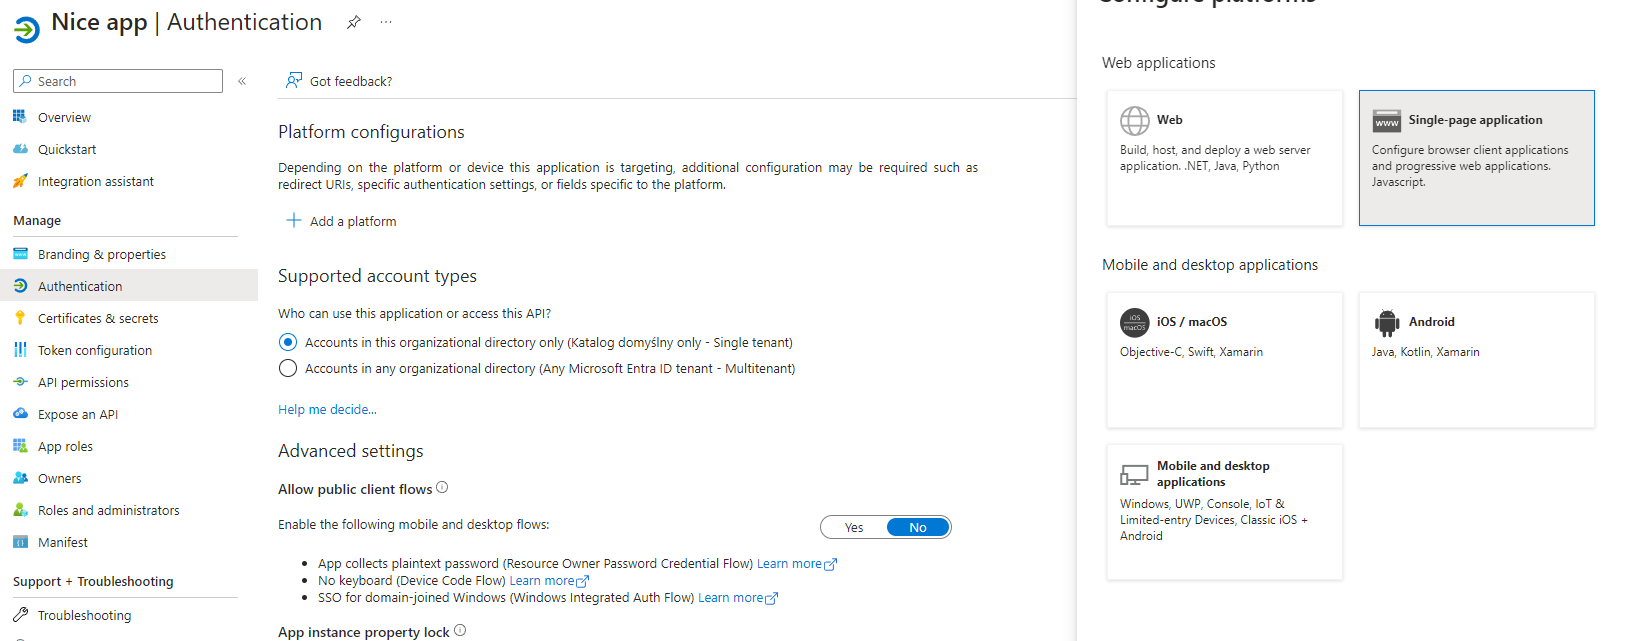
- Enter valid url where promptsail app will run. You could enter internal or external URL. Add to URL subpage
/signin, where the login takes place. The default configuration ishttp://localhost/signin. Remember to specify the port if it’s other than 80, for examplehttp://localhost:5173/signin. -
Press Configure
-
You can add more redirected URLs by pressing Add URI in new section below Add a platform button
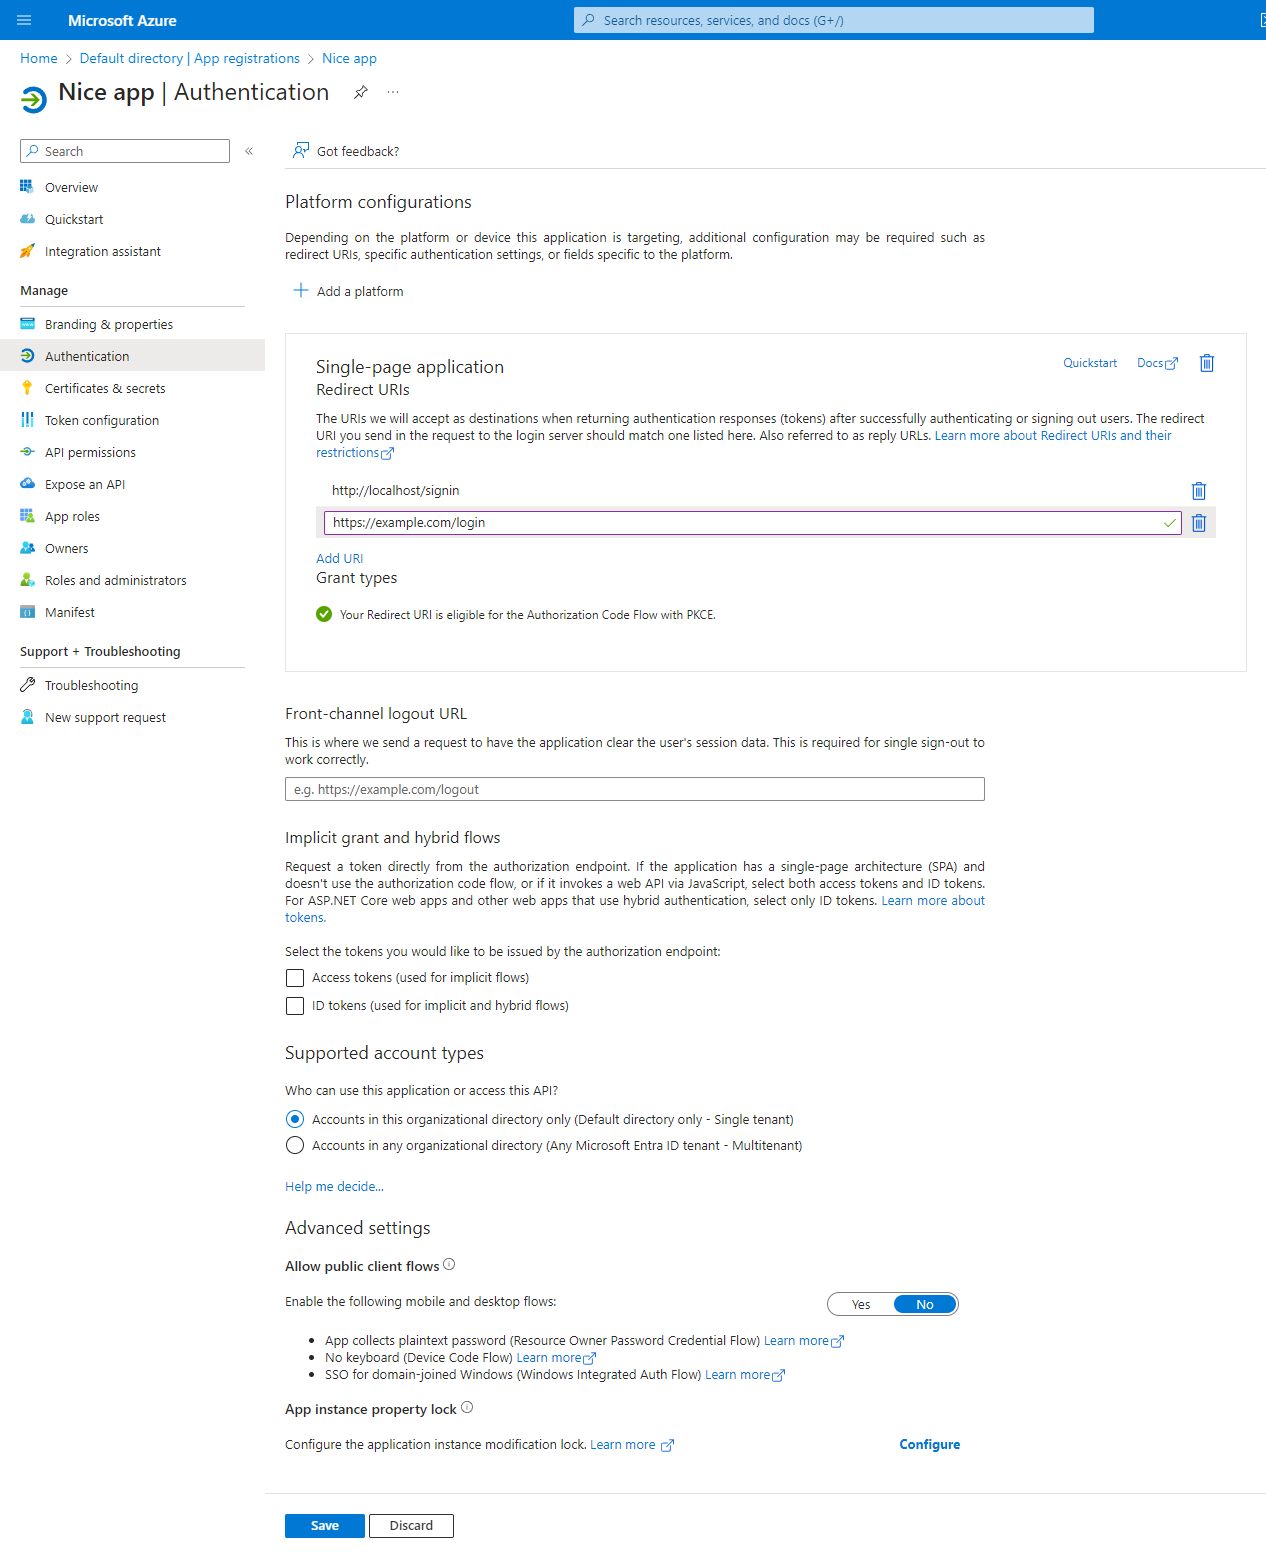
- Press Save
-
Now you can make neccessary changes in
docker-composewhich are describe ealier (if you not done it already) and then Microsoft Azure SSO will be work on promptsail apppromptsail-backend: ... environment: ... AZURE_CLIENT_ID: '00000000-1111-2222-3333-123456789012' SSO_AUTH: "True" ... promptsail-ui ... environment: ... PROMPT_SAIL_ENV_PLACEHOLDER_SSO_AZURE_CLIENT_ID: '00000000-1111-2222-3333-123456789012' PROMPT_SAIL_ENV_PLACEHOLDER_SSO_AZURE_TENANT: '22222222-3333-4444-5555-123456789012' PROMPT_SAIL_ENV_PLACEHOLDER_SSO_AZURE_SCOPES: 'user.read' PROMPT_SAIL_ENV_PLACEHOLDER_SSO_AZURE_AUTHORITY: 'https://login.microsoftonline.com/22222222-3333-4444-5555-123456789012' ...